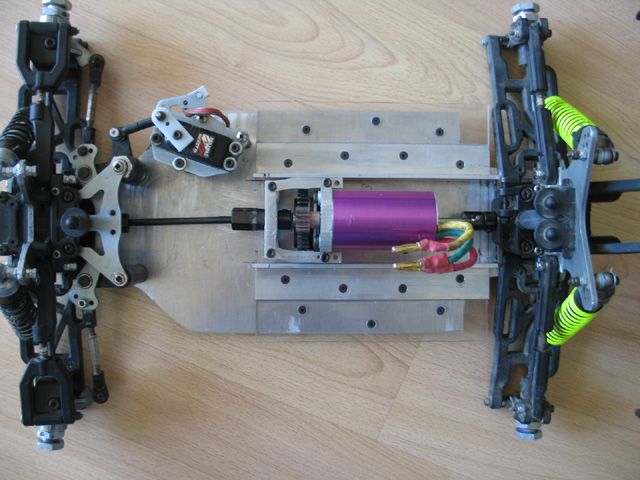
Got an update :). I have the lower plate cut and put together (all holes drilled), and I have a new motor mount/tranny mount.
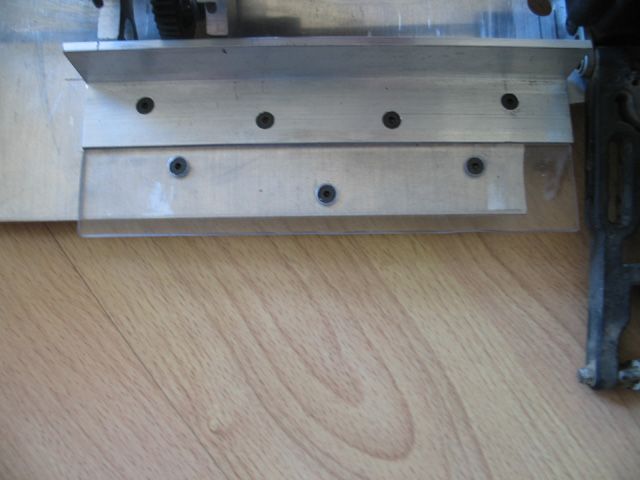
Chassis - This chassis now has 2 aluminum angle pieces. These serve 2 purposes: they strengthen the chassis (since I couldn't angle up the edges of the chassis) and they are for battery mounting. The clear (1/8") pieces you see next to the angle pieces act as raised platforms for the batteries to sit on. With this new mount, I can fit up to 7 NiMh cells per side! The widest battery I can mount on each side is 50mm (about 2"), which is wider than what is usually used. I plan on cutting holes from the chassis once it is finished to reduce the weight. These holes will be strategically place so that the chassis will be lighter but still maintain good strength.
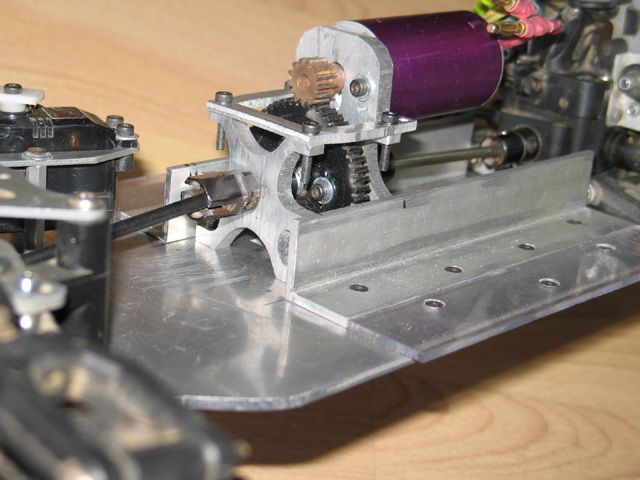
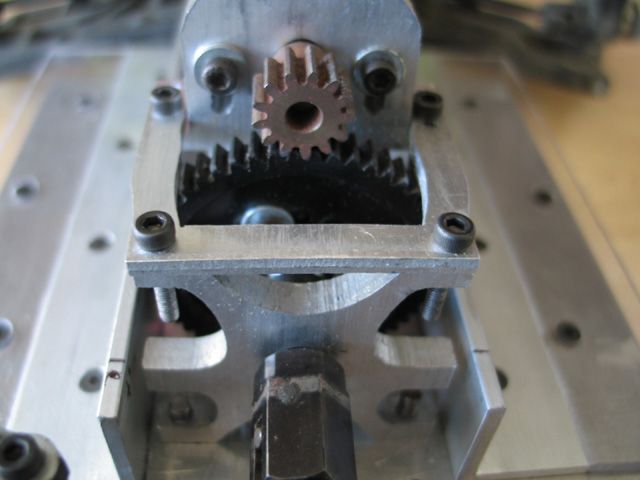
Motor mount/tranny mount - This design is new for me. When I first built a vertical mount, it was from 1/8" thick aluminum, and it bent very easily. This one is cut from 1/4" aluminum (like the last mount), and is very strong. Between the front bearing support (for the slipper clutch) and the motor plate, the spur gear spins freely, which took me about an hour extra to finally get to work. Both the front piece and the motor mount will have screws that will attach to the angle pieces on the chassis, which will give extra strength to keep the whole unit together. The top plate should keep the motor plate from wobbling and bending. If you look closely at the upper plate, you will see 2 rear-facing holes. These are there so that sometime down the road I can add a motor brace to keep the rear endbell from popping off.
Here are the pics: