


|

|
(#61)
|
|
RC-Monster Titanium
Offline
Posts: 1,007
Join Date: Apr 2010
|
08.15.2010, 08:31 AM
impressive buddy!!! nice idea on the skid plate...
do you remember some others mounting their centre diff to an flm skid plate.... can you please enlighten me on how you constructed your rear arm protectors and what material they are made from. I am very interested in this idea.... At the moment i was going to utilise small front bumpers from buggys and attatch via screws... but this looks like a much more fool proof method |
|
|

|
|
|
|
|
(#62)
|
|
|
RC-Monster Aluminum
Offline
Posts: 800
Join Date: Oct 2009
|
08.15.2010, 08:36 AM
What about just using some Lexan?
Quote:
|
|
|
|
|

|
|
|
|
(#63)
|
|
RC-Monster Titanium
Offline
Posts: 1,007
Join Date: Apr 2010
|
08.15.2010, 08:51 AM
It is a little too flexible isnt it ? im sure people have tried it...does it work well?
|
|
|
|
|
|
|
|
(#64)
|
|
RC-Monster Carbon Fiber
Offline
Posts: 233
Join Date: Sep 2009
Location: Australia
|
08.16.2010, 07:45 AM
I've seen plenty of shots of lexan guards on truggies\buggies but i'm not sure how they would hold up on a Flux used as a basher. How thick can you buy it?
Originally i used plastic cover from an A4 sheet paper holder. It was too thin. I run in a few places that are a little rocky and the guards were shot to pieces by the flying stone after just one run. Then i had the idea to cut the guards out of this document case that i no longer needed (don't think it was that expensive anyway). The material was much thicker and withstands the stone strikes well. 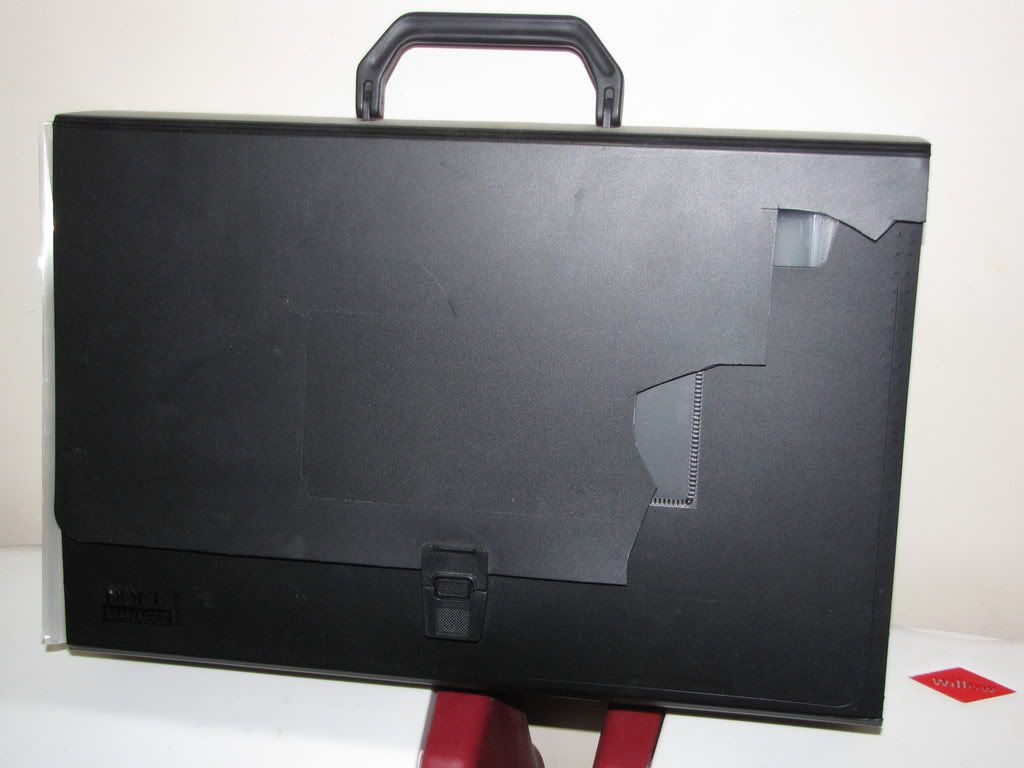 Close up of the mounting method. Basically just zip tied through the two holes in the arm. The third zip tie to the top is needed to stop it bending forward after a while. This method works well except that after 10 runs or so stone strike will usually wear through the bottom zip ties but they are easy to replace. Combined with a guard that I used to mount on the rear stock Flux battery mount the rear dog bones and drive\axle cups would remain very clean compared to no guards. Also used to get stones jammed in that area fair bit before i put the guards on, well worth the effort. 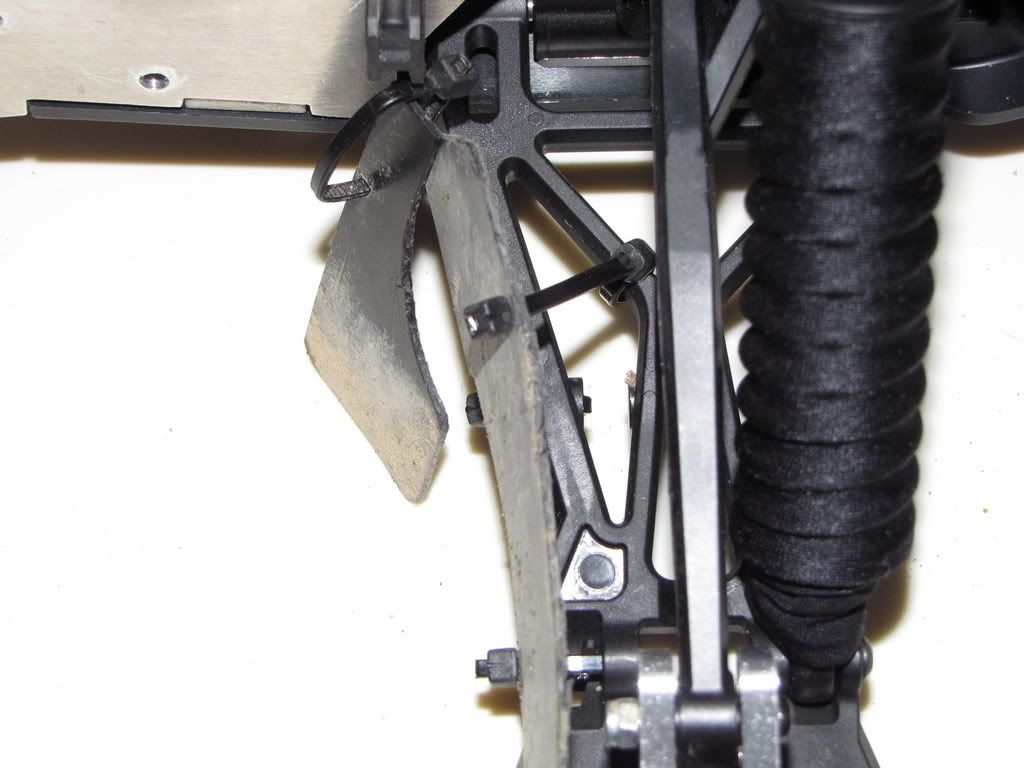
|
|
|
|
|
|
|
|
(#65)
|
|
|
RC-Monster Aluminum
Offline
Posts: 800
Join Date: Oct 2009
|
08.16.2010, 08:28 AM
Thickest I've seen in sheets sold for hobby stuff is .060. You could probably search online and find it thicker in the general industry sites, but might pay more (or maybe less).
Quote:
|
|
|
|
|
|
|
|
|
(#66)
|
|
KillaHurtz
Offline
Posts: 2,958
Join Date: Apr 2006
Location: Bucks Co, PA
|
08.16.2010, 10:56 AM
Looks good man. What did you use to cut the TVPs? A scroll saw?
How difficult is it to do all that? I imagine its mostly tedious work rather than difficult. Keep it up, nice job! |
|
|
|
|
|
|
|
(#67)
|
|
RC-Monster Carbon Fiber
Offline
Posts: 233
Join Date: Sep 2009
Location: Australia
|
08.17.2010, 04:48 AM
I used a jigsaw to do most of the outside cutting of the TVPs and a Dremel for the cutouts. The cutouts are difficult. Those 4 cutouts in the pic took around 4 hrs including marking them up.
I wouldn't say the work is overly difficult, epecially if you have some metalwork skills\experience, which unfortunately i don't. There has been a lot of planning and time gone into the build though. A lot of my weekends over the last 6 months have been eaten up. For someone looking to build there own I would urge them to learn some CAD, draw them up and pay to get them cut. For the amount of time you will spend making them manually (and cost of tools) it will be worth it and the accuracy will be much better than you will likely be able to manage yourself. If your doing something really custom though like mine the protoyping with the MDF board would probably still be useful as its very cheap and easy to work with. There are a few minor things i would like to change on the TVPs so i have actually started a CAD drawing for them so that in the future i can get someone to cut them for me without having to remake them from scratch. Got the replacement adjustment ring for the slipper on Mon so i will get to do some more test driving on the weekend, this time with the lower mod 0.8 gearing. Looking forward to it. |
|
|
|
|
|
|
|
(#68)
|
|
RC-Monster Carbon Fiber
Offline
Posts: 233
Join Date: Sep 2009
Location: Australia
|
08.21.2010, 09:50 AM
Got a lot done today. Some pics of the final assemby.
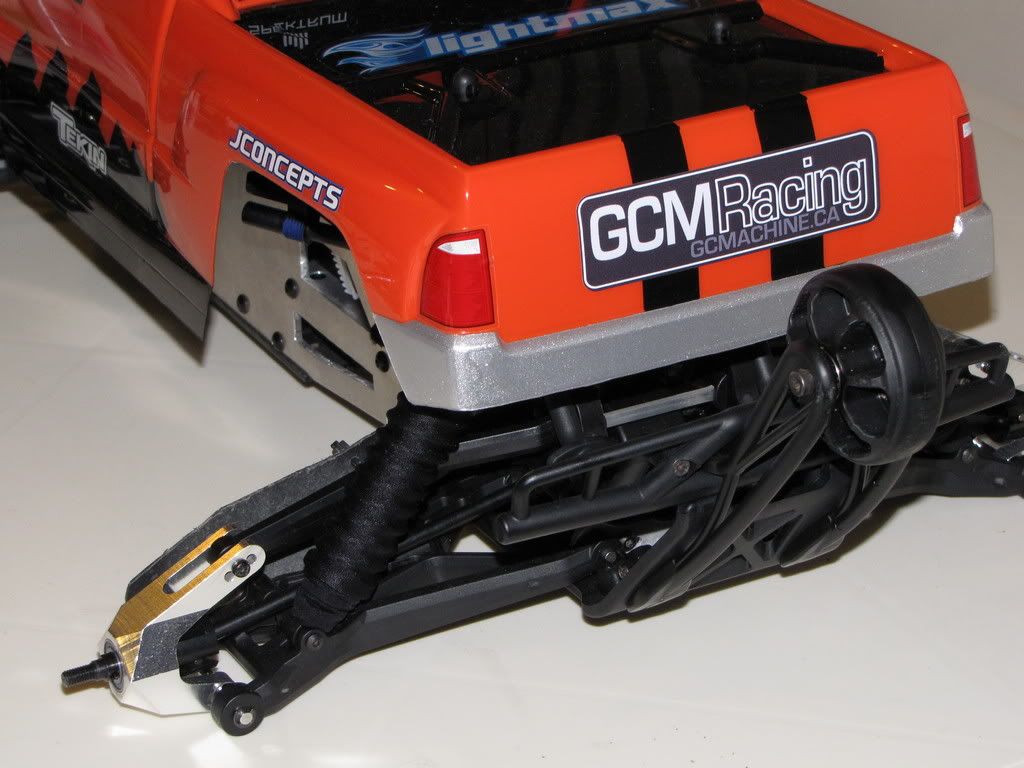
drivetrain overview  rear mud guards  shock tower supports  skid plate  battery tray  motor mounted  top view  radio box  with body 1  with body 3  Going for a drive in the afternoon tomorrow. Hopefully i can figure out how to make decent video of it. |
|
|
|
|
|
|
|
(#69)
|
|
RC-Monster Carbon Fiber
Offline
Posts: 233
Join Date: Sep 2009
Location: Australia
|
08.21.2010, 09:52 AM
Many thanks to GCM! Without the custom driveshafts this build would not have been possible.
|
|
|
|
|
|
|
|
(#70)
|
|
Fat Kid Engineering
Offline
Posts: 3,634
Join Date: Jun 2009
Location: Hot as Hell West Central Coast Florida
|
08.21.2010, 11:50 AM
Looks very nice !
I'm gonna be working on mine this weekend hopefully ? |
|
|
|
|
|
|
|
(#71)
|
|
RC-Monster Titanium
Offline
Posts: 1,007
Join Date: Apr 2010
|
08.22.2010, 01:45 PM
looks great! vids vids vids!
|
|
|
|
|
|
|
|
(#73)
|
|
Guest
Posts: n/a
|
08.22.2010, 08:35 PM
Looks like the regular XL body,called the gigante I think? Very cool build by the way--Josh
|
|
|
|
|
|
|
|
(#74)
|
|
n00b
Offline
Posts: 519
Join Date: Apr 2009
Location: The Netherlands
|
08.23.2010, 04:21 AM
It looks fantastic.
How's the weight distribution, pretty sweet I guess. As stated above : vids, vids, vids!! |
 |
|
|
|
|
|
(#75)
|
|
RC-Monster Carbon Fiber
Offline
Posts: 233
Join Date: Sep 2009
Location: Australia
|
08.23.2010, 06:07 AM
Thanks for the kind comments guys, much appreciated after the long build.
Freeze: Yes its the Savage XL stock body, the Gigante. The only thing different about the shape is that i cut the sides lower than was marked as i thought that would look better. Nard: Last time i checked it was about 1/2 cm forward of center but i've added cutouts to the rear since then. Its also very light but i haven't managed to get hold of a scale i can weigh it on yet. Vids, will definitely get to them. Might have time this weekend to give it a go, haven't posted a vid to youtube before. Took the truck out on Sun for its first decent drive. Only had the old stock wheels on (haven't glued the new ones yet) and the old shell. Bashing area of choice was a mostly flat area of dirt\small stones and a few piles of earth. I walked away about 45 mins later with a huge smile on my face  . . It handles great, it's responsive and predictable and just gives that feeling of being easy to drive. I went out with another guy who had a totally stock Flux and driving that after mine just felt like i was struggling for control all the time. Jumping was also great. It flies rather nicely through the air with no real tendency to dive or end up on its tail and it was landing without bottoming out. Suspension might actually be a touch stiff now with the tower supports and when i put the new lower profile tires on. Heat was also good with the 16\58 pinion\spur. Ambient was probably 20-25c (forgot to check) and the ESC and motor were about the same temp. Max temp i saw was 34 point something c on the ESC. Slipperential was also much better than the short test runs. The 3 wave springs with the evenspacing of the overlaps really reduced the slip. I didn't have to tighten the adjustment ring much this time though it was probably harder to tell on the looser ground. Tekin motor\ESC combo has just as much brute power as the Castle MMM system but its just so incredibly smooth running at all speeds. Things did go much better than i expected. So many different things could have gone wrong but didn't. Nothing broke, overheated, loosened or just didn't function as expected. The only issue i had was a design one with the center diff mount. The cutout for the spur gear should have been wider so that there was a space under the slipper adjustment ring. Kept getting small stones stuck under it. Took the skid plate off which seemed to help a little but at the end of the run a stone got stuck and the mod 0.8 delrin spur stripped. I still have the metal mod 1 spur and i picked up a 13t pinion for it today that will bring the ratio close to what the mod 0.8 set up was. Not too sure what to do about the skidplate though as it covers the cut out for the spur. I could just leave it off when running in rocky areas or maybe cut a hole in it as well. Only made from cheap mdf so i might try a couple of different ones. Do people with center diffs in buggies\truggies on a flat chassis have this problem? Soz about the long post. Couple of the better pics i took of the truck outdoors before it became permanently dirty :) 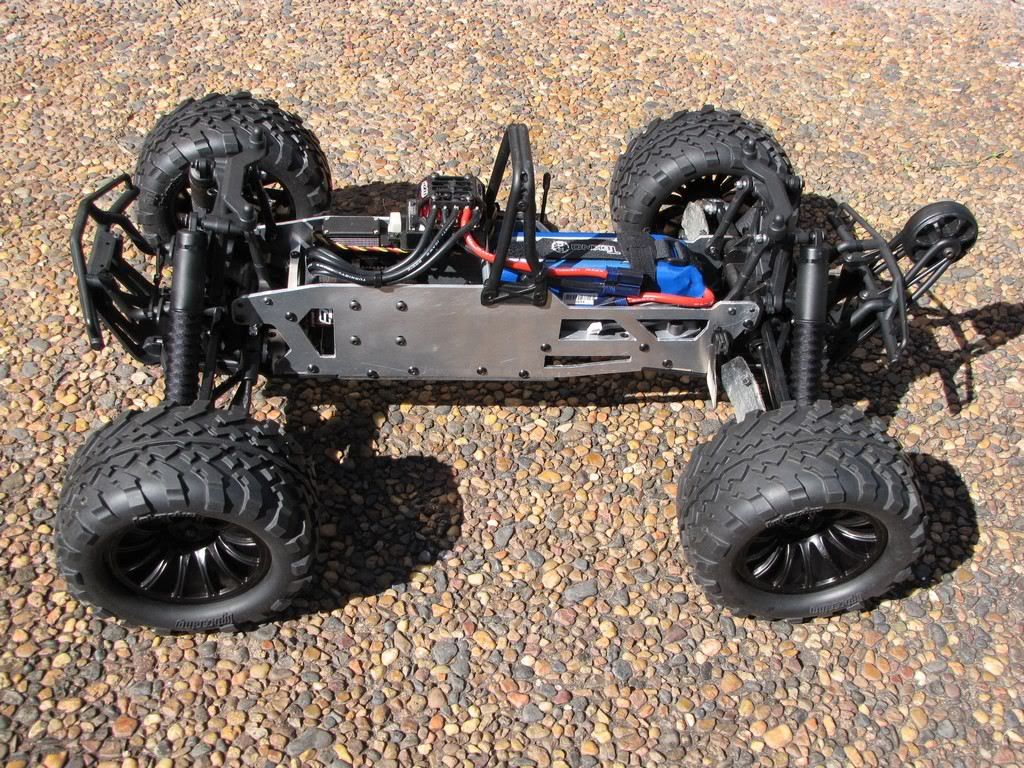 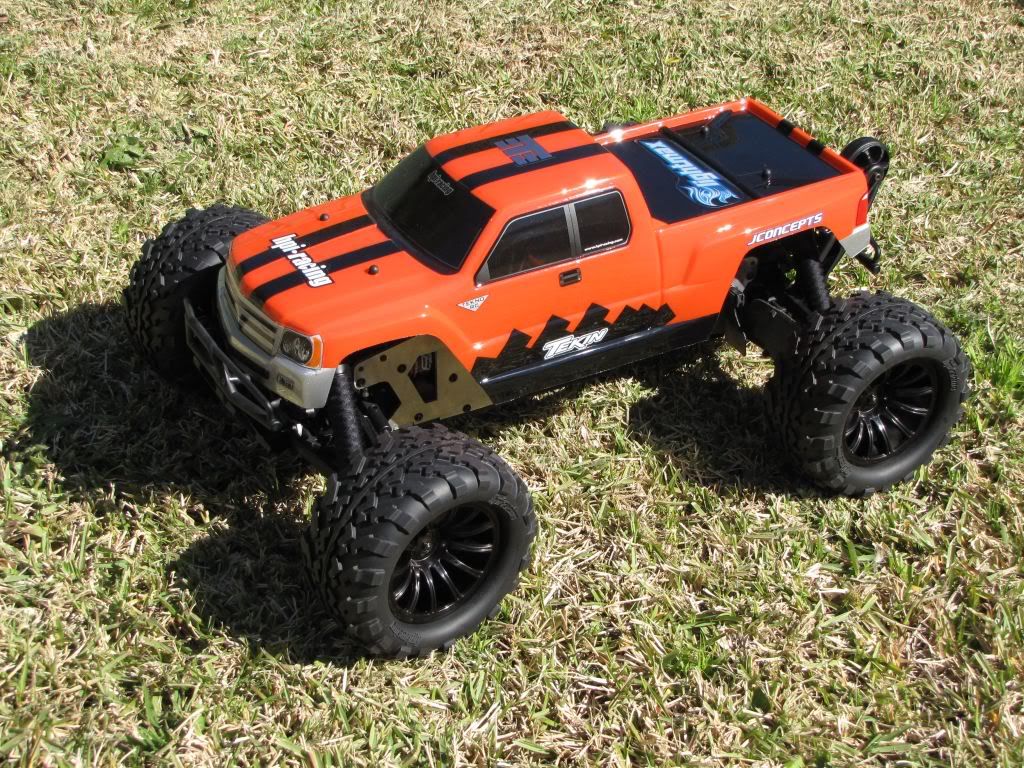
|
|
|
|
 |
«
Previous Thread
|
Next Thread
»
| Currently Active Users Viewing This Thread: 1 (0 members and 1 guests) | |
| Thread Tools | |
| Display Modes | Rate This Thread |


 Linear Mode

|
|

Powered by vBulletin® Version 3.8.11
Copyright ©2000 - 2026, vBulletin Solutions Inc.
vBulletin Skin developed by: vBStyles.com
Copyright ©2000 - 2026, vBulletin Solutions Inc.
vBulletin Skin developed by: vBStyles.com