


|

|
(#16)
|
|
A Horse's Ass
Offline
Posts: 1,065
Join Date: Oct 2007
Location: Spokane WA
|
01.07.2009, 02:07 PM
Thanks. I made a motor mount out of lexan but I isn't anything worthy of a pictures yet. I screw up right off the bat and drill a hole in the wrong spot. Tried to salvage the peice of lexan by working around it. It works have hoad it out a few times. I haven't been able to try and beat it up though. All snow up here. It's been doing great in the snow. Got deep so I put some 2.2 Moabs on it for some ground clearance. So far I am liking it a lot. Will see how it how. Will be nice to have some other DST builds going on here at RCM.
|
|
|

|
|
|
|
|
(#17)
|
|
A Horse's Ass
Offline
Posts: 1,065
Join Date: Oct 2007
Location: Spokane WA
|
01.26.2009, 07:06 AM
Before I get ahead of myself check these threads concerning bearings, center differentials, Motor Mounts, etc. If you need info concerning that part of a dst conversion.
http://www.rc-monster.com/forum/showthread.php?t=17911 http://www.rc-monster.com/forum/showthread.php?t=17962 I scrapped version one of the motor mount after spending some time this weekend making a new one. This one turned out much better then version 1. It's atleast pciture worthy. I still messed up a little with the motor mount screw slots but will be able to use a couple small washers to mount the motor with. The mounts work great no binding and is real smooth. Center diff spins freely and is angled correclty with the center shafts. Unlike my first version if you are wondering why I mention that. It's held up for a test run but will need the washers for a little piece of mind while I am running it. Kind of bummed about that washers because I liked the keyhole access for mounting the motor but they are useless with washers installed unless I make the access hole the size of the washers. These pics are some of the draft pictures before I put some finishing touches on it like cleaning and "polishing" the edges up to get a clear glass look.   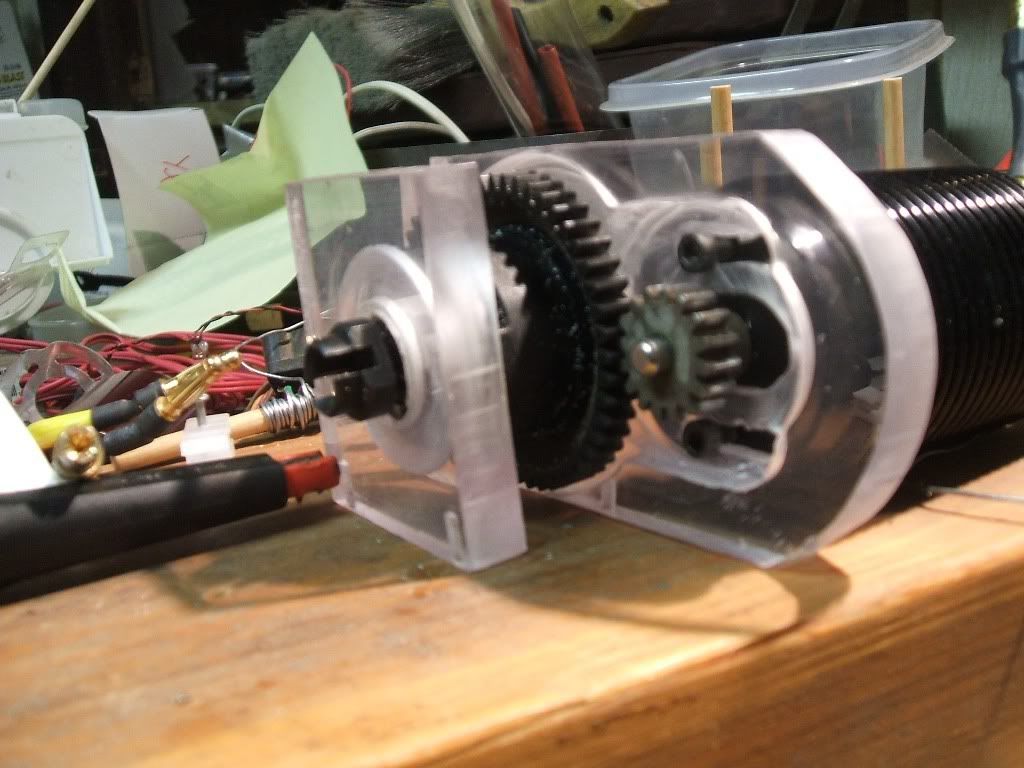 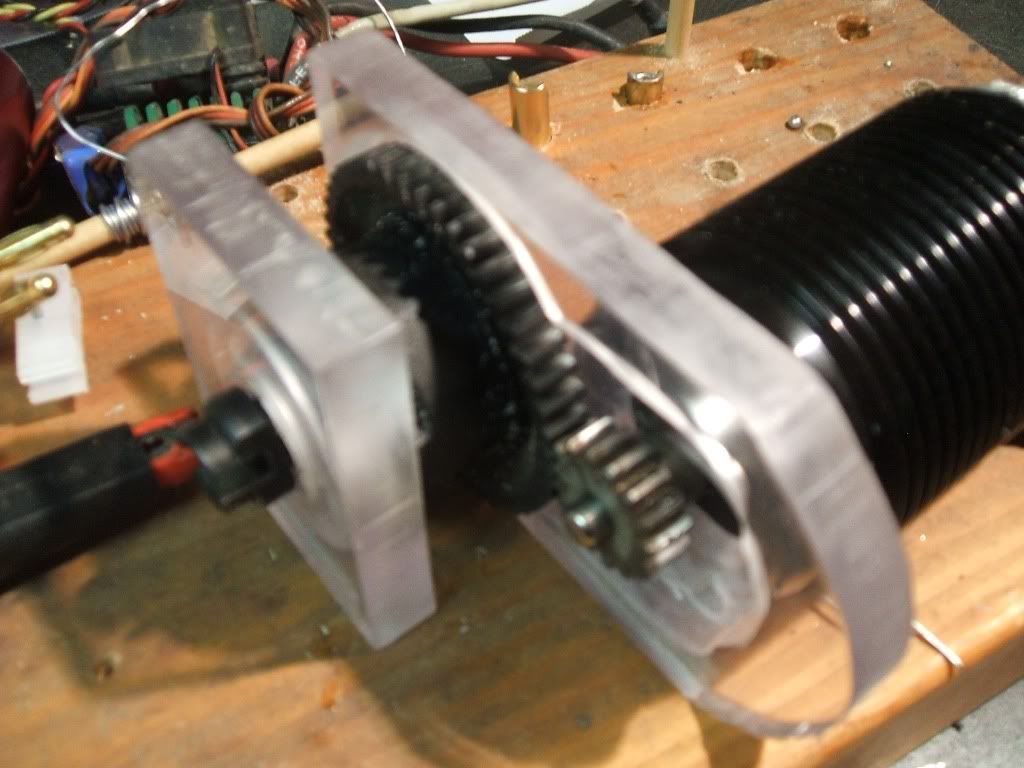 Actually the second (smaller mount) in those pictures was scrapped and a new one was made. That one didn't line up right and was a little off in size. |
|
|
|
|
|
|
|
(#18)
|
|
RC-Monster Carbon Fiber
Offline
Posts: 392
Join Date: Nov 2008
|
01.26.2009, 08:01 PM
do you plan on selling that mount? do you think an 8.5t LRP and novak Havoc ESC could move this truck?
|
|
|
|
|
|
|
|
(#19)
|
|
RC-Monster Carbon Fiber
Offline
Posts: 392
Join Date: Nov 2008
|
01.28.2009, 05:45 PM
just got mine today, these things look pretty fun. Bad weather over here though, so i dont think i can run it until friday. More updates soon
|
|
|
|
|
|
|
|
(#20)
|
|
|
A Horse's Ass
Offline
Posts: 1,065
Join Date: Oct 2007
Location: Spokane WA
|
01.30.2009, 11:36 PM
Quote:
Here's some more pictures of the mount in place. I thought I posted them but apparently I didn't. Wasn't a whole lot of creativity involved. Mostly adapting what Mike has already tested and has proven in his designs. Stolen design for the most part, but not even close to the quality of his products. I loved the keyholes for the motor mounts and the slot to get the right angle on the grub screw for the pinion. Lexan has it's limits when compared to aluminum, but it is easier for me to work with. With the Kyosho mount I would run into the 18mm bearing issue and it also mounts the motor on the other side. I wanted to keep from drilling anymore hole in the chassis for now. I don't own the CRT .5 or a RCM mount for it but it is the only RCM mount that I saw that would allow the motor to mount on the left side of the chassis. It may be a good alternative mount if you run an crt. 5 center differential in this. You would need to check the foot print of one. The top tray will be cut and modified (bent) a little different soon. It is pretty plain right now. A clear battery tray is also in the future to match the rest of the setup. Similiar to the one I made for the LS10. I had pictured a one piece top tray and battery tray but that's still just a picture in my head. I don't have enough clear lexan to do just a simple battery tray like I would like too, so will need to find a piece that will work or order some from ebay. These pictures show the edges rounded off and polished and heated to make them a bit clearer. I didn't screw up too bad while heating it this time. On this one I recessed the spur into the mount a bit and also did so for the pinion to sit into. It made the spacing between the two mount work out better using 3/8" lexan compared to the 1/4" stock size. I took a bit too much out of the first mount witch allowed too much flex between the pinion and spur. You can see in one of the pictures the first mount I made that has the a KD motor attached. Made some small improvements over it and well took a little extra care and had a little more room to mess with this one. Mainly because I had backup lexan in case I screwed this one up. The first one was a salvage project trying to make the most out of a limited amout of lexan. It's only hit a few high jumps off some snow burms so far. Still need to do some fine tuning on the suspension when I get some consistent conditions to test it on. So still need to put it through some real good test when the weather clears and snow and ice melt away. I've replaced the stock steering servo so far. Was acting a little erotically as I read that many have had that problem also. Just slapped in a JR Z590 for now to cover the duties. It's been used in the mud and snow so the stock could have gotten some water damage. We all now how great stock servos usually hold up. Also been trying out a few different buggy wheels and tires on it. A little more clearance and some experimenting with the traction on ice and snow. 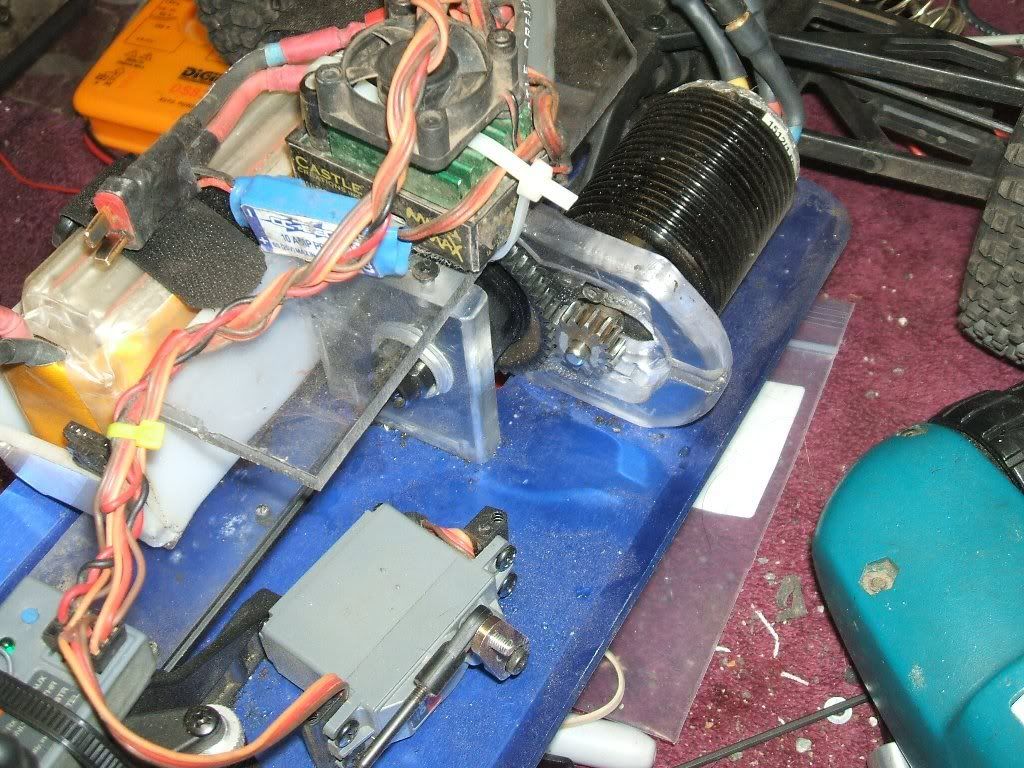   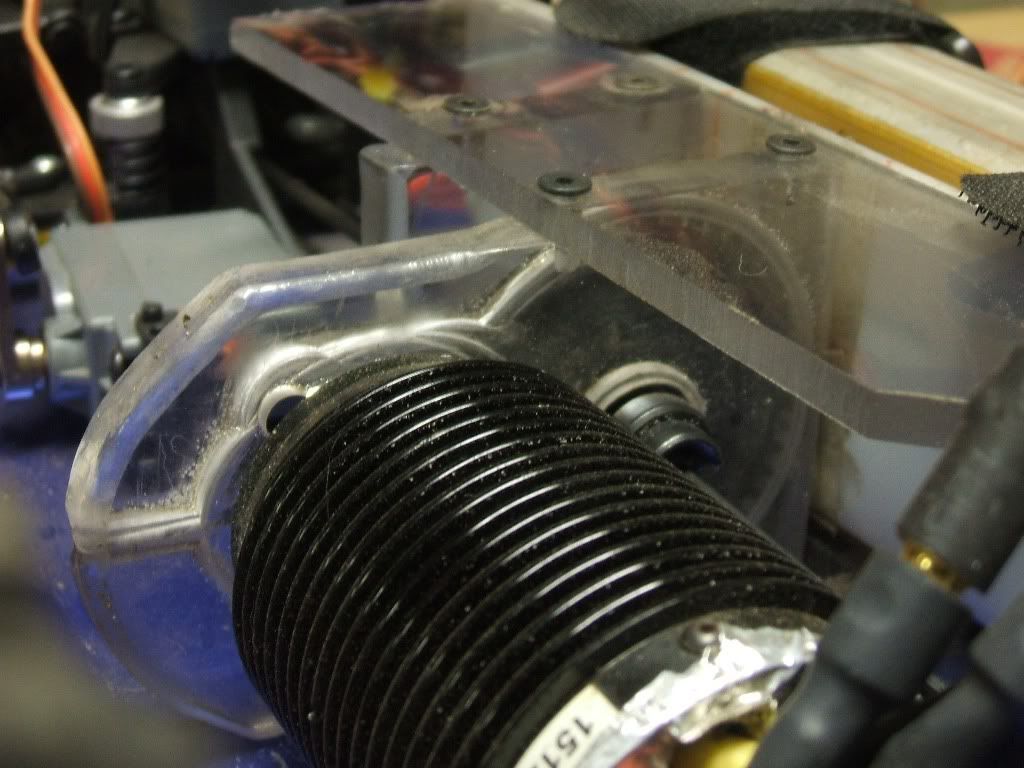 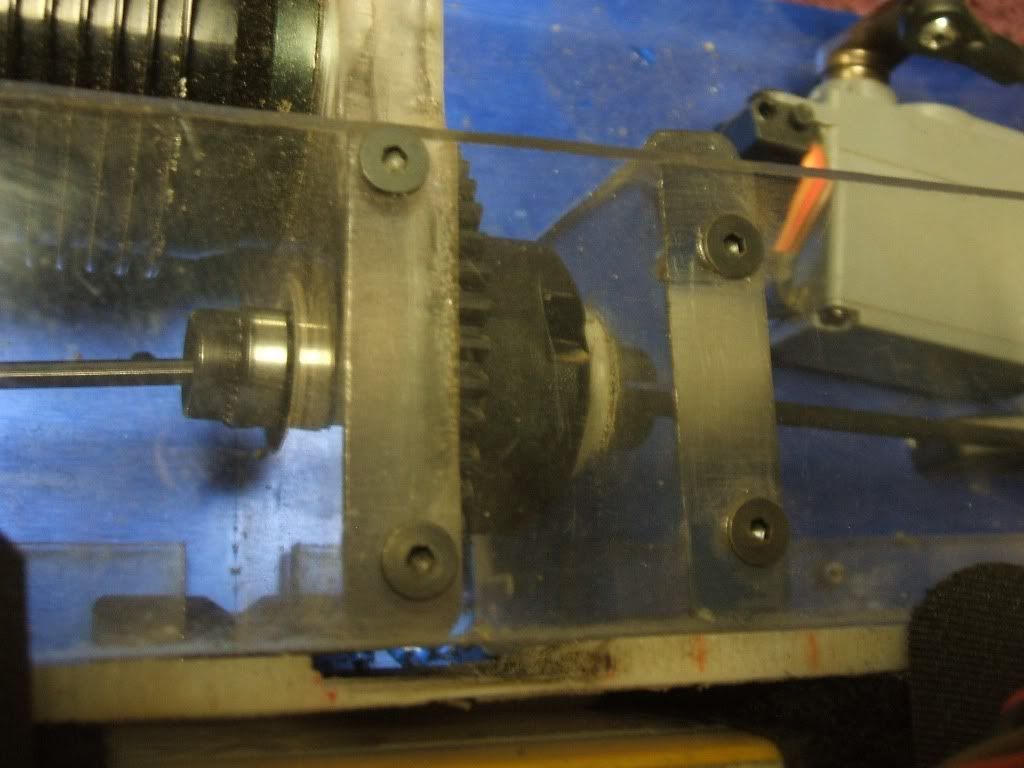 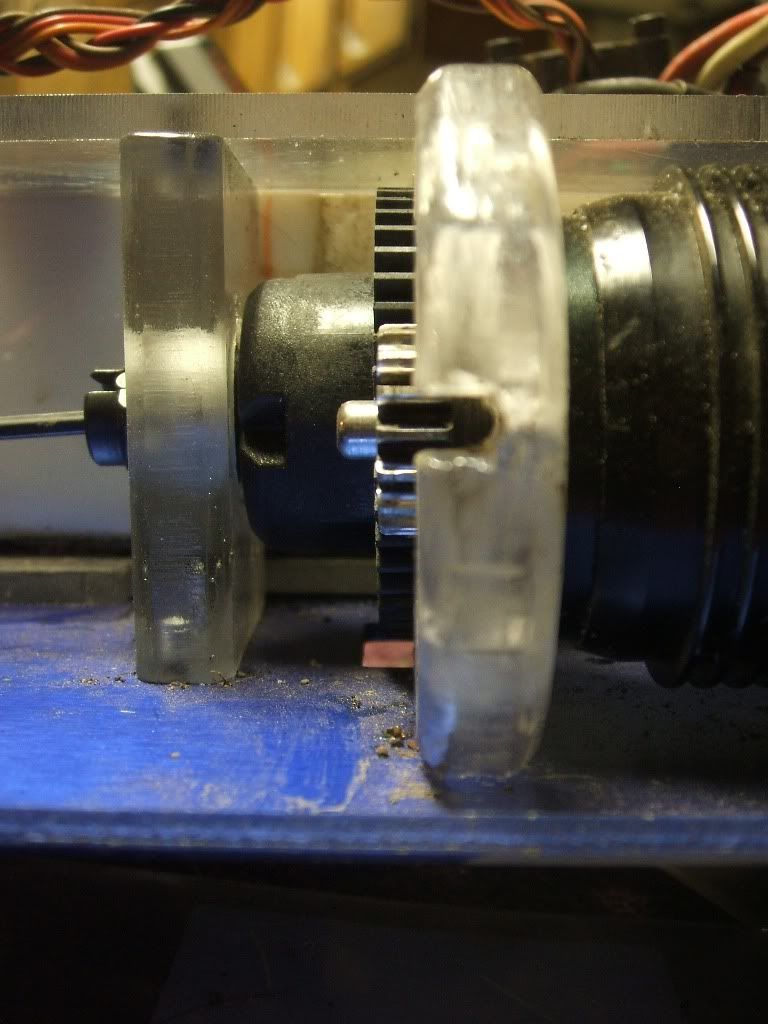  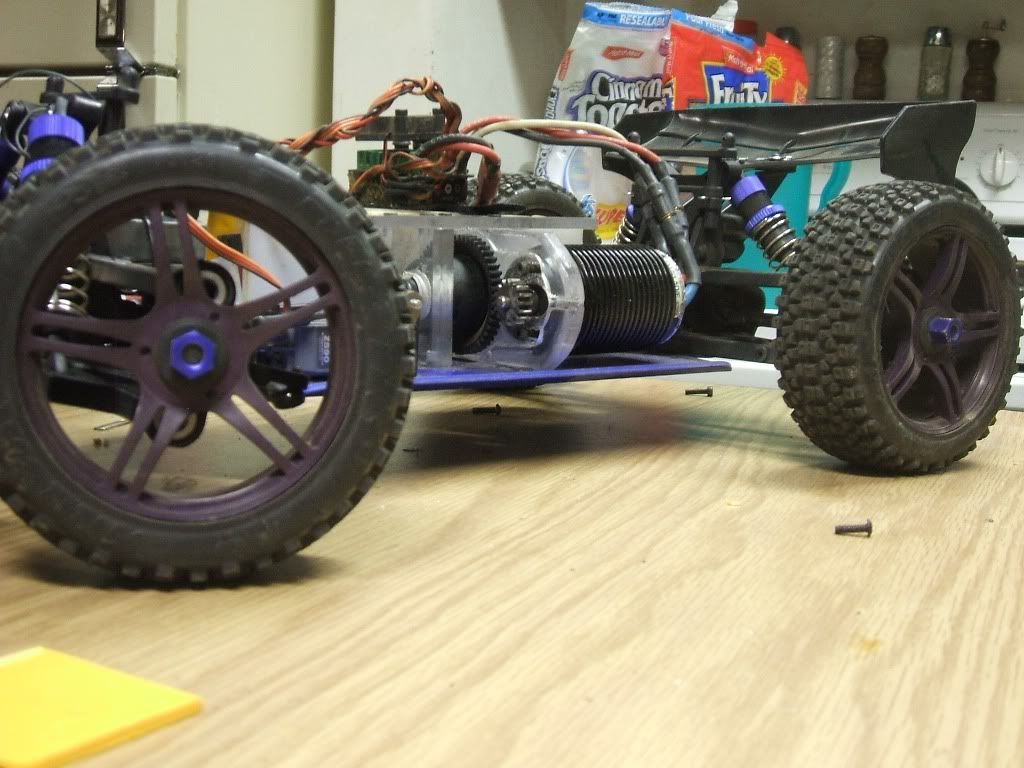 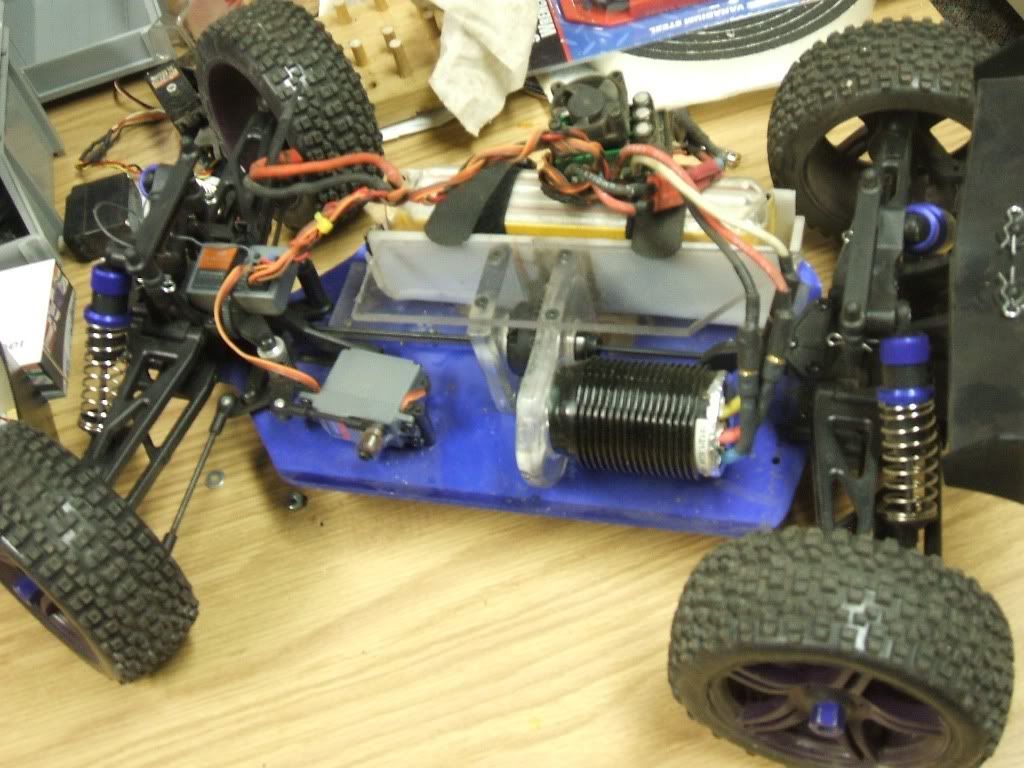 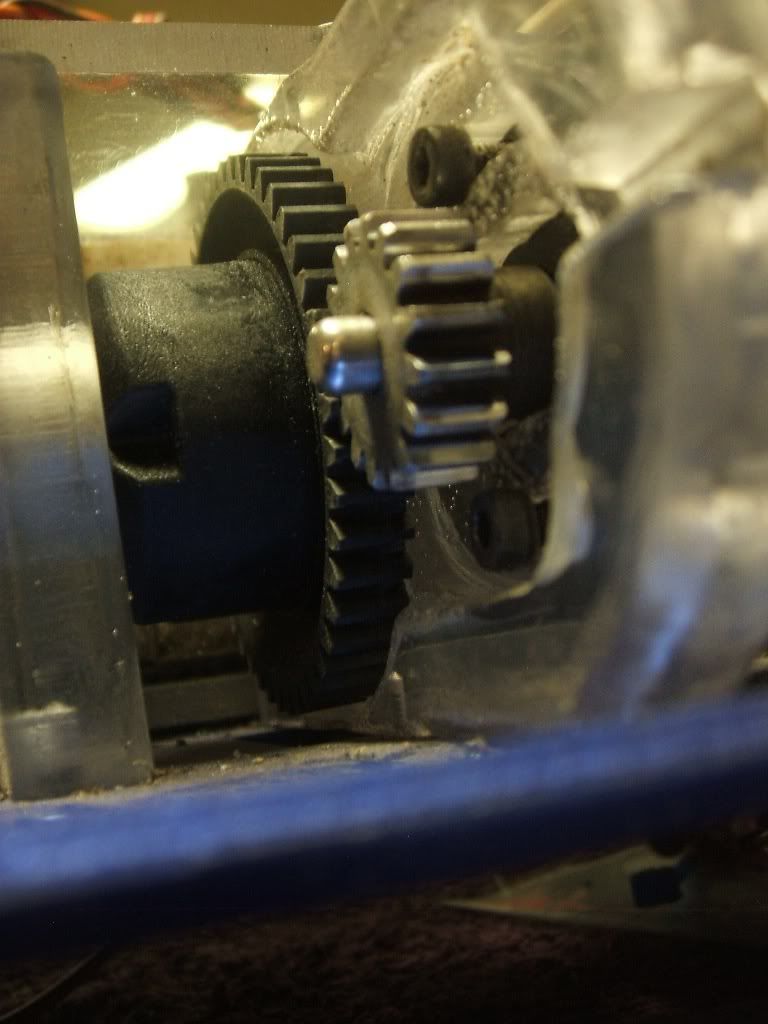 And yes the Neu 1512 1.5d on 4s is overkill to all of the non RCM memebers reading this. The losi eight is taking the winter off so you know, just had to do it. Will be hard to run something lesser in it if I don't do it soon. |
|
|
|
|

|
|
|
|
(#21)
|
|
Guest
Posts: n/a
|
02.08.2009, 08:55 AM
nice build mate
the good thing is that kyosho is still coming up with monthly upgrades for this thing....looks much better without all those plastic parts! how much bigger is it to the crt.5? |
|
|
|
|
|
|
|
(#22)
|
|
A Horse's Ass
Offline
Posts: 1,065
Join Date: Oct 2007
Location: Spokane WA
|
02.08.2009, 05:31 PM
Thanks. I am not sure what the size is compared to the .5. Never seen a crt .5 first hand. I took some pictures of it next to some of the ones I had when I first got it. Don't know if those shots will help you out. How big is .5 compared to a Rustler?
|
|
|
|
|
|
|
|
(#23)
|
|
RC-Monster Carbon Fiber
Offline
Posts: 127
Join Date: Sep 2005
Location: philly
|
02.13.2009, 02:30 PM
how did you get the 1/8th buggy rims on there?
|
|
|
|
|
|
|
|
(#24)
|
|
A Horse's Ass
Offline
Posts: 1,065
Join Date: Oct 2007
Location: Spokane WA
|
02.13.2009, 03:33 PM
I had some of those plastic 17mm Maximizer adapters laying around from my Slayer and they fit. Mike has the same ones in his store, but they are alum instead of plastic. The buggy tires work good and gives it a little more clearence.
|
|
|
|
|
|
|
|
(#25)
|
|
RC-Monster Carbon Fiber
Offline
Posts: 212
Join Date: Feb 2009
|
03.02.2009, 11:23 PM
Gee -
That's really nice! I just bought a used DBX to convert to brushless also. I really wanted a DST, but couldn't find one for cheap. Do you know what pitch the spur gear is? Mod1.0?...Mod0.8/32p? Thanks. I plan on throwing on some larger wheels/tires to make it more truggy-like. I have my E-Savage stock wheels/tires that I think would do nicely. Then another set of 1/10 MT wheels w/ off-road tires. |
|
|
|
|
|
|
|
(#26)
|
|
UE Supermaxx Addict!
Offline
Posts: 1,006
Join Date: Feb 2009
Location: Gadsden, Alabama
|
04.03.2009, 01:38 AM
I don't mean to sound ignorant, but instead of having to mill a new center-diff mount, couldn't you have just used a custom-size bearing and used Mike's RCM ST-RR mount? or, just mill the RCM mount to accept the Kyosho bearing?
I mean, I love making my own parts as well, but in this case, I would love to have yet another one of Mike's millings on my truck...you know? Anyway, just my $0.02... PM ME IF YOU HAVE THE BELOW: VBS, CVDs, GM Single-Speed, OTB, Ultramaxxed, Super6, Strobe, Sprong, CNR Brake, UE Hex, DUH Towers, Predator, Blackbird, GA Blue Screws, HCR F/R Skids & Mutant |
 |
|
|
|
|
|
(#27)
|
|
RC-Monster Carbon Fiber
Offline
Posts: 212
Join Date: Feb 2009
|
04.03.2009, 01:41 AM
I'm almost done with my conversion and I used a Graupner mount that I needed to cut in several areas to make it fit without contacting the rear bulk on the center diff, the front bulk on the center diff, and the rear drive cup on the center diff. Hopefully it works out well.
|
|
|
|
|
|
|
|
(#28)
|
|
A Horse's Ass
Offline
Posts: 1,065
Join Date: Oct 2007
Location: Spokane WA
|
04.03.2009, 03:09 AM
JSR - sorry I didn't see your question earlier. YOu probably got the Mod 1 figured out by now. I've since uncoverted this one back again to see what it runs like with the engine on it. It will go back brushless later this summer.
Chadworkz - it's been a little while since I did this conversion but there were a lot of factors that went into why it ended up like it did. I am sure mike would have did some custom work if he had the time. We briefly discussed the options for it. Custom bearings are very hard to find. Most of the mounts also are on the other side of the RC and Kyosho also seem to have odd size bearings. Most of this was done with what I had on hand to work with. There have been several projects since this conversion. I'd have to go back and follow my trail to refresh my memeory. I do not clearly remember all the options I researched looking for the best way to do this. I will have to trust myself by thinking I did and this was the best option for me. I've made lots of stuff out of lexan including a ruslters chassis and complete set of arms for it. I actually enjoy the challange that it presents vs buying something that would make my life easier. There are more way to skin a cat. Good luck with catching it. jsr - would like to see some pics when you get your done. |
|
|
|
|
|
|
|
(#29)
|
|
RC-Monster Carbon Fiber
Offline
Posts: 212
Join Date: Feb 2009
|
04.03.2009, 09:15 PM
Will do Gee. I'm almost done. I just need a few hours to finish everything up and test it. Prob is I'm not sure when those few hours will be available.
|
|
|
|
|
|
|
|
(#30)
|
|
RC-Monster Carbon Fiber
Offline
Posts: 212
Join Date: Feb 2009
|
04.04.2009, 08:57 PM
Ok, I got almost 2hrs to work on my RCs today (that's a lifetime for me...got the baby to sleep for a couple of hours). Here's my DBX (I wanted a DST, but couldn't find a used one) converted to brushless.
Per RCM's calculator, it should go 40mph, but it seems to be doing only about 30-32mph on 3s. Still fun and fast. The Graupner motor mount has flex since it's plastic, so there's a pole piece (a long piece that was a plastic standoff I got from another truck) underneath the motor to prevent the motor from moving down as it hit bumps (thus changing the angle of the pinion to spur). The Graupner mount has to be cut where the spur is to allow for space for the spur to contact the pinion, and where the front center diff bulkhead is to allow the mount to be moved inward toward the centerline of the chassis to let the spur and pinion contact. I drilled 2 holes in the base of the mount, one rear of the motor interface and one front of the motor interface to attach the mount. The rear hole attaches through an existing hole in the chassis that I widened (to allow for adjustability toward and away from the centerline to account for different tooth/size pinions). I had to drill and widen a hole in the chassis for the front hole in the motor mount to line up. I used concaved washers and flat-head bolts underneath with nuts on the top of the chassis to secure the mount. I'd recommend a stiffer mount, something metal. I got the Graupner mount from Offshore Electronics. Their DR metal mount would probably be better, but it would have been much harder to cut as it would still need cutting. Looking at the pics of the OSE DR mount, it would need to be right where the motor attaches to the mount to make clearance for the center diff rear bulkhead. This part would cut close to the mount hole for the motor, so you'd have to be careful and I'm not very clean at cutting with my dremel. To fit the E-Sav wheels, you need to buy 12mm to 14mm hex adapters and drill out the center hole on both the adapters and the wheels to allow the larger spindle diameter of the DBX to fit through. The stock springs are super soft, so I'm running Ofna yellow (which I think are Medium stiffness) springs I took off my Ofna truggy shocks. The springs now are too stiff for the oil, so I need to change oil. I plan to use 60wt and see how that is. Because the ESC sits in the space where the RX battery pack used to go, I couldn't get a temperature reading, but by feeling around it (the heatsink), it didn't feel hot. The motor hit a max of 120F with ambient about 77-80F. I might put a 16T pinion on to see how it performs with that (I want a little more top speed). SETUP: Hobbywing EZRun 60A ESC Hobbywing 17.5T 2400kV Motor UBEC 6V/3A Graupner Plastic Motor Mount (cut to fit) 13T Pinion HPI RX (Kyosho one died) HPI E-Savage wheels/tires (~5.4" diameter, drilled) 12mm to 14mm hex adapters (drilled) Ofna Yellow (Medium?) truggy springs 3s LiPo        
|
|
|
|
 |
«
Previous Thread
|
Next Thread
»
| Currently Active Users Viewing This Thread: 1 (0 members and 1 guests) | |
 Linear Mode

|
|

Powered by vBulletin® Version 3.8.11
Copyright ©2000 - 2026, vBulletin Solutions Inc.
vBulletin Skin developed by: vBStyles.com
Copyright ©2000 - 2026, vBulletin Solutions Inc.
vBulletin Skin developed by: vBStyles.com